2013年7月10日 星期三

Dinosaur Generation

I promised my nephew and niece to make them felt dinosaurs
before they attend grade school.
This is the first project in two years.
After two years of hard work, I finally achieved my dream.
Now I am a full-time teacher in a national high school.
As soon as I learned that I got hired, I ordered the kits right away.
I finished all three dinosaurs in a matter of 4 days.
There was a lot of hand sewing and stuffing though they were very small in size.

But I seemed not to have learned from this promise thing.
I promised them to take them on a trip to the U.K. after they
complete learning all the classical English prose, poems, and Bible excerpts available at home.

I have no idea when I have to walk my talk. But I certainly have to start saving money from now on!


2013年3月1日 星期五

Holiday morning with the Kids

    Yesterday was a national holiday here in Taiwan. In the morning, my sister-in-law, her three kids and I went to a piano classroom to check out their potential piano teacher. As my nephew and older niece are going to the first grade this fall semester, we thought it in order for them to start learning some basic piano lessons.

    Later, we went to the largest park in the city where we live in. My two brothers and I used to spend lots of our childhood days playing in there. It was a place full of memories. Taking the kids to the park, I felt that the fun was all the same even though all those years have passed by. Slides and swings are kid's all time favorite all around the world!


        Left to right:
     Vicky (2), Ginnie (6), and Ian (7)

    After the fun, we "cooled down" in a bookstore featuring books in foreign languages nearby. Ginnie picked out a story book about Mcqueen. She kept saying how much she adored the book as she put it back onto the shelf as we left. Maybe it would make a wonderful birthday gift for her. 


2013年2月23日 星期六

I got a new Ukulele

     I got a ukulele for myself. Ukuleles are now very popular in Taiwan. I learned of this musical instrument a few months ago from my students. Now I've finally got one for myself.

     I don't know how to play it, though. I'm searching on youtube for some instructions. Also, I'll be going to a free tutorial in the shop where the ukulele was bought. I'd like to be able to play and sing at the same time some day.

2011年8月28日 星期日

My photo

Here is a photo of me. I rarely take any photos recently.
Since I have to hand one in to the school I work for (so the school can introduce me to all the feculty and students), I had it taken this morning. Well, I'm considering wearing long hair again.....


Happy Sunday, everyone!

Shelly

2011年8月23日 星期二

What I've been up to

Wow, I haven't written anything new for quite a while.
During all this period of time, though, I kept coming back to my blog almost daily to get updated on the blogs I follow.

There wasn't anything quilty recently because I got a job, which has become my priority.

Actually I started quilting during the most difficult time in my life.
The process of learning quilting, meeting fellow quilters, blog hopping, and sharing my projects has truly been therapeutic. The wonder that quilting has worked in me is beyond description.

Now that I am working as a teacher in a local high school, I have met many wonderful students. Though there is still some time before I can come back to quilting, I'm already thinking about what quilty presents I can make and give to my dear students. The mere thought of it is exiciting enough for me. Well, my fingers crossed that things will go well and I'll try to get back to sewing a.s.a.p.

Have a nice day, everyone!

Shelly

2011年3月11日 星期五

Bookworm Bookmarks

I was inspired by Sew Many Ways and made these bookworms one after another. Except the rainbow one, the others were put into good use and no longer new.

They were for some children to whom I taught English.
I pictured each child's facial expression as I sewed the face part.
All were different but deeply loved by my little students.

Also, I have a wee fabric art that I'd like to share here.


At some point last year, I was teaching C-cat and made the picture above. I used scrap fabric for the borders and some unwanted thread to make a kitty. Common glue worked quite well; the fabric never came off the paper. Very often as I looked into my waste basket after I was through with a project, I was dazzled at all the beautiful colors mixed together. Maybe I should save all of them and make more paper-fabric  art in the future!

2011年2月8日 星期二

One flower Wednesday

Here are two hexagon coasters I made for my dear friends as their Chinese New Year's gift.
I used paper piecing method to make hexi flowers, removed the paper, and whip stitched a felt to the back.
And they became beautiful coasters. I knew my friends would be afraid to use them, for fear of spoiling them. I attached a little loop at the top so they can hang it up somewhere instead. lol
Mandy and Tina, my best friends. They told me they wouldn't use the coasters but would hang them up. ^^ 

Happy Chinese New Year!

2011年1月19日 星期三

Surprise Package from the UK

2011 must be a lucky year for me, for I have won a giveaway from Ros over at Rose-Munda.

The package arrived this afternoon. I opened it right away and found lots of goodies. 
Here is a picture of everything laid out:


The goodies came in pink and I was tickled pink opening them up.
Everything is nicely wrapped in cellophane and very redolent. There are a card, yo-yos, a teddy bear key chain, a bookmark,  embroidery floss, Twinings tea, a square of gorgeous fabric measuring 22",  rose-shaped buttons, a lavender bag, and best of all, a hand-made eye mask with lavenders inside.

I've always wanted to make an eye mask but never did it.
Now I have one as a new year's gift. Lucky me!

Thank you, Ros, for this gorgeous giveaway. ^^

2011年1月13日 星期四

Call for sewing caddies

        Gum Tree Designers is calling for sewing caddies to help crafters in Australia. It is suggested that the caddies be posted by the 15th of March.


If you'd like to help, click on this link to see the details.

2010年12月22日 星期三

Owl key chain holders

       I planned to make some small Christmas gifts for some ten children, who came to my house every Sunday night to recite Chinese classics. Surfing the web for inspiration, I stumbled across Craft Passion's owl key chain holder. I fell for the design right away and made them. And voila!


       Darker colors seemed to work better with this pattern. My nephew and neice preferred the blue ones. I told them, though, that they had to work hard in class to be in the running. Fair play is important after all.

       I'll try to post pictures of the children with these owls, that is, if I remember to do that. Before that, let's listen to these owls' hooting.
Owl language interpretation: Merry Christmas!!


2010年11月25日 星期四

Puzzle quilt

Yesterday I finished the second quilt in the year.

Like the name of this quilt, I was quite puzzled after finishing it because I planned to have six rows but I ended up with only five. I still couldn't figure out where the last row went.


I had so much fun shopping for fabric and trying to get the best look.  It is going to a baby girl of my friend, to thank him for the helps he had given me before. I even attached a label to the back.


Though hand stitching creates a unique look, I am not really into it that much.


If you hold the quilt against the light, you get this amazing effect:


Finally, to show you a complete look of the quilt.


2010年11月17日 星期三

Giveaways

A few giveaways:

1. Corrie at Retro Mummy is giving away fat quarter fabrics. It's a generous one and 3 people will be chosen.


2. Tea Rose Home is holding a Thanksgiving giveaway.
There are some good prizes. Pop over here if you're interested!

Good luck, everybody!

2010年10月27日 星期三

Pinwheel quilt finished

Ta-da. Here is my baby quilt which took me 10 months to complete.
My dad was holding it for me this morning. I love this picture. Can you see the pinwheels turning? Sit further back in your chair and I'm sure you will.

Here is the back--shells and stars.

I thought there should be a sky, some sunshine and cloud above the pinwheels, so I appliqued some on. I liked it how the quilting made the sky looked filled with cloud.


About the width of borders, I sat brooding about it for an afternoon, net-surfing for ideas. Finally I decided to cut the bias strip 2.5" wide, which allowed me just enough leeway for the stich in the ditch finish. The finished width on the front is 1/4".

I also spent some time doing the square root calculating to determine how much fabric was required for making the strip. It turned out that a mere 24" square of fabric produced the length I needed (about 234"). I'd have to write a formula for this on excel at my leisure. Arithmetic made me dizzy.


See those little clips? They were so handy during binding process. No pins, no fazing pinpricks! When I came to the corners, I used double-sided tape to secure the mitre. They made my life easier.

By the way, I followed the tube method to cut binding strips. Check out the super clear video tutorial from the link. It was fun and saved me the hazard of joining all those ends. But you want to be extra careful when cutting the tube not to catch the fabric under the layer you're cutting. 

That's what I have to share. I find it helpful setting deadlines for my quilts, otherwise I have no idea when it can be done. I'm off to start piecing another quilt which is due the end of November.

2010年10月24日 星期日

I am Free Motion Quilting!!

I can't believe finally I get to use the darning foot I purchased more than 1 year ago. I've been studying about FMQ and practiced doing it for some time.

I finished piecing and basting my quilt, and the quilting is in full swing. When I was basting, at first I put the quilt on a mattress but found it didn't work as it got wrinkled. Then it dawned on me why other quilters laid their quilts on the kitchen floor when basting: because other areas are carpeted. From this I learned that only flat and solid floor worked. Hours of basting almost finished me and I decided to use an adhesive spray for my subsequent quilts.

My sewing table was quite small. But I made the most out of it by adding a few things to reduce the dragging force of gravity.


 Books! Literature books came in handy at this time. They were just the right width. Don't I love literature! Thanks, Charlette Bronte and all! 

I also used my ironing board, which is the same height as my table, for suppor on the left side. With them, I was all set.


About the quilting pattern, I wanted to try circles to create the turning effect of pinwheels. But the result was funny so I switched to meandering right away.

Meandering proved to be much better and I stuck to it. I'm almost half way through. Free motion quilting was a lot quicker than I had thought. I could literally "quilt in a day", if I wasn't disturbed.
Off to continue quilting right now. It's my first time free motion quilting a big quilt. Hopefully it turns out alright.

2010年10月23日 星期六

Giveaway News from other sites

Micki on Irish Muses is holding a Accuquilt Go giveaway.
She's so generous that each person can have 4 entries at most.
Go and check this out.


Bear Bits is also giving away a very cute bear:
http://bearbits.blogspot.com/2010/10/my-fall-giveaway.html#comment-form

How cool is that!

2010年9月11日 星期六

Tutorial: zipper pocket

When making handbags, it's always nice to have a zipper pocket for privacy.
I managed to take photos while I made one. I might not have done it perfectly. But the following is virtually the steps to making a zipper pocket.

1. Prepare the materials
You'll need your lining fabric, pocket fabric, and a zipper.

Cut the lining fabric according to your bag pattern. 

Choose a desired length of zipper based on the size of your bag and your personal preference. Here I used a 6" zipper.

As for the pocket fabric, it is 8*16". The width should be 2" longer than the length of your zipper. You'll also have to decide the length of your pocket according to the size of your bag. The length of your pocket fabric is (length of pocket+1")*2. If my pocket should be 7", then the length of the pocket fabric is 16".

You might want to iron on some interfacing onto the back of both pieces of fabric.

2. Draw a rectangle on the wrong side of your pocket fabric. The rectangle should be 1" away from the top and two sides.

Ignore the numbers in this picture. The rectangle is always 3/8" wide. Add 3/16" to your zipper for the length.

Draw a dotted line along the middle of the rectangle. At 3/8" from each end, mark a diagonal line to the corner to make a "Y" look. Refer to the next picture for this detail.

3. Find out the center of lining fabric and pocket fabric, lay them right sides together, the pocket fabric on top of the lining. Note that the top of pocket fabric is 1" lower from that of the lining fabric.


4. Sew around the rectangle.


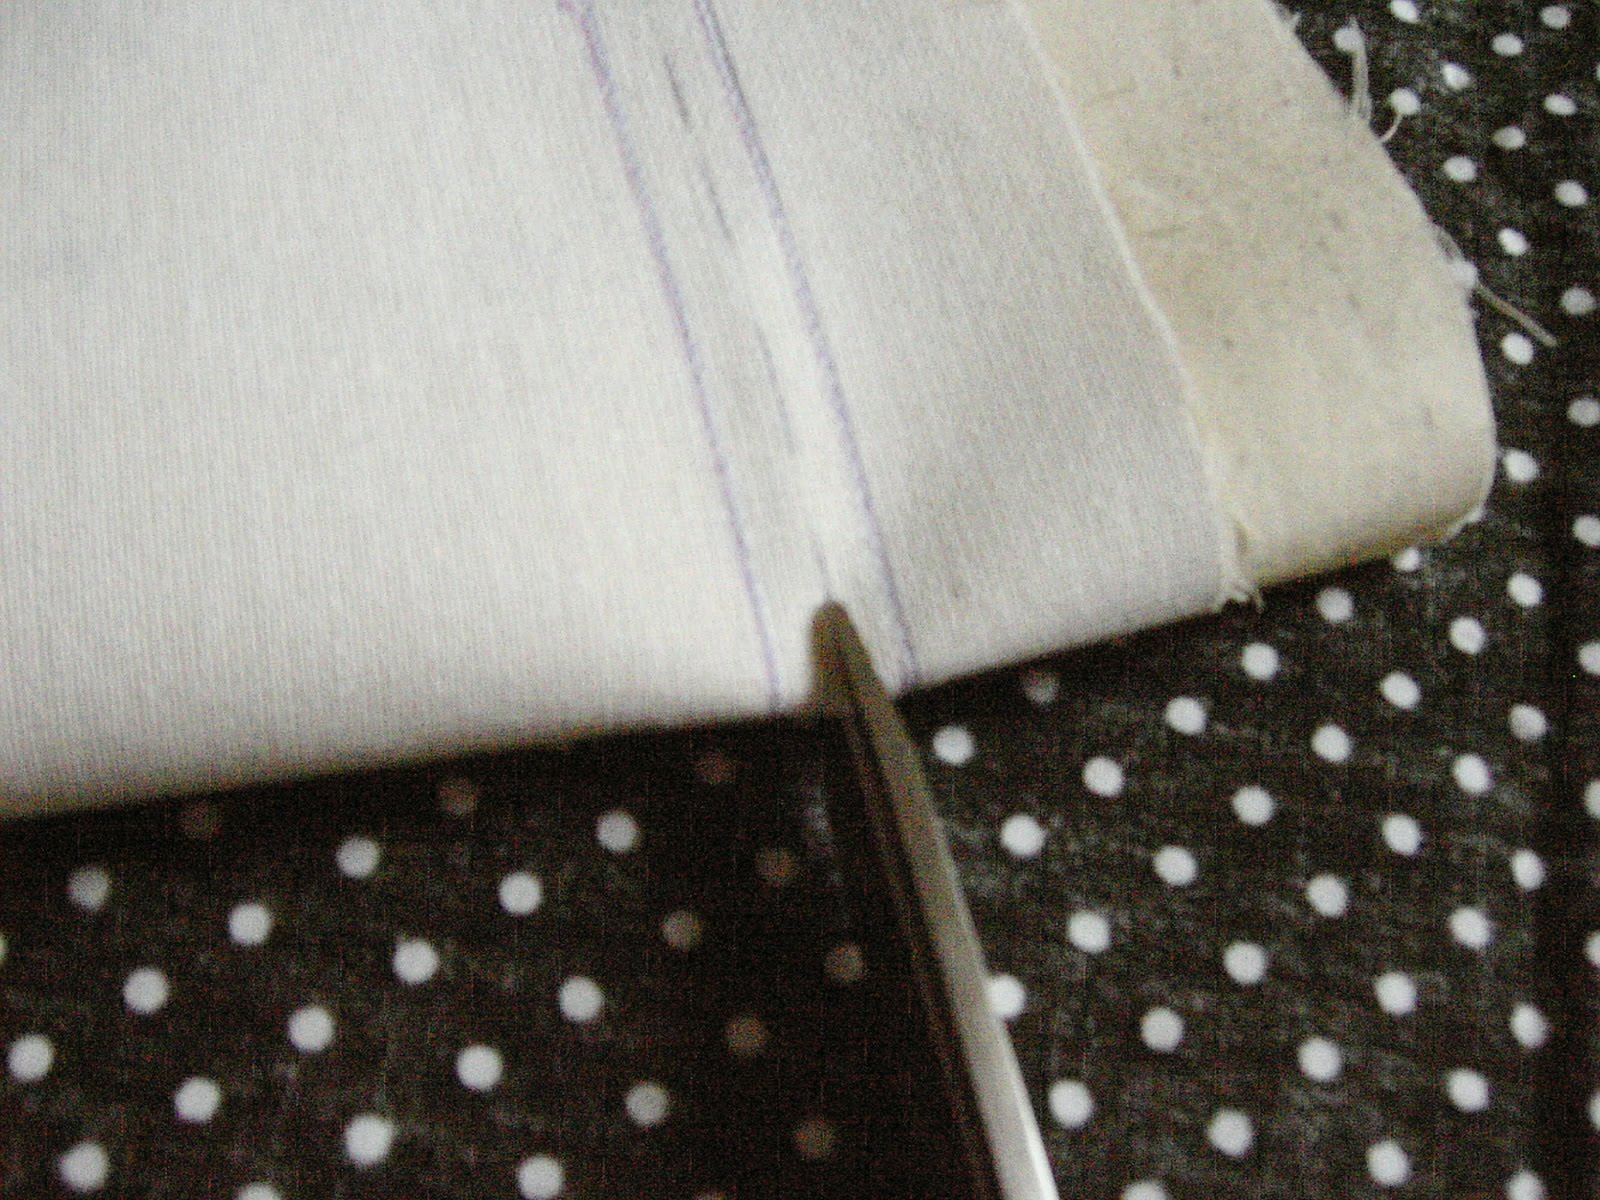
5. Cut along the dotted line. You can lay your first snip by folding the fabric in half as shown below.


Keep cutting until you reach the "Y".


Cut the diagonal line, go as deep as you can. Take care not to cut the thread.
You'll end up with two dogs ears at both ends of the rectangle.

 6. Turn the pocket fabric to the back of the lining through the hole.

After you turn the whole pocket fabric to the back, press the fabric nice and neat with your iron. There shouldn't be any puckers as in the photo. When I was sewing the rectangle, I went a bit askew at the corners.
7. Insert and baste the zipper to the rectangular opening.
8. Sew around the zipper using a zipper foot.
   Start from the tail of the zipper. At this point, the zipper is closed.
As you sew towards the head, pull the zipper to the back so the head won't be in the way of your needle. Be very careful with this because zippers can easily break your needle.

Keep sewing and you're almost done!
9. Turn to the back. Fold the pocket fabric in half lengthwise to form the pocket. Pin and sew around the 3 sides. Make sure you don't catch the lining fabric as you sew. That is, you only sew 2 layers of fabric instead of all 3.
10. Voila! A zipper pocket finished. Laugh, clap and celebrate!