I managed to take photos while I made one. I might not have done it perfectly. But the following is virtually the steps to making a zipper pocket.
1. Prepare the materials
You'll need your lining fabric, pocket fabric, and a zipper.

Cut the lining fabric according to your bag pattern.
Choose a desired length of zipper based on the size of your bag and your personal preference. Here I used a 6" zipper.
As for the pocket fabric, it is 8*16". The width should be 2" longer than the length of your zipper. You'll also have to decide the length of your pocket according to the size of your bag. The length of your pocket fabric is (length of pocket+1")*2. If my pocket should be 7", then the length of the pocket fabric is 16".
You might want to iron on some interfacing onto the back of both pieces of fabric.
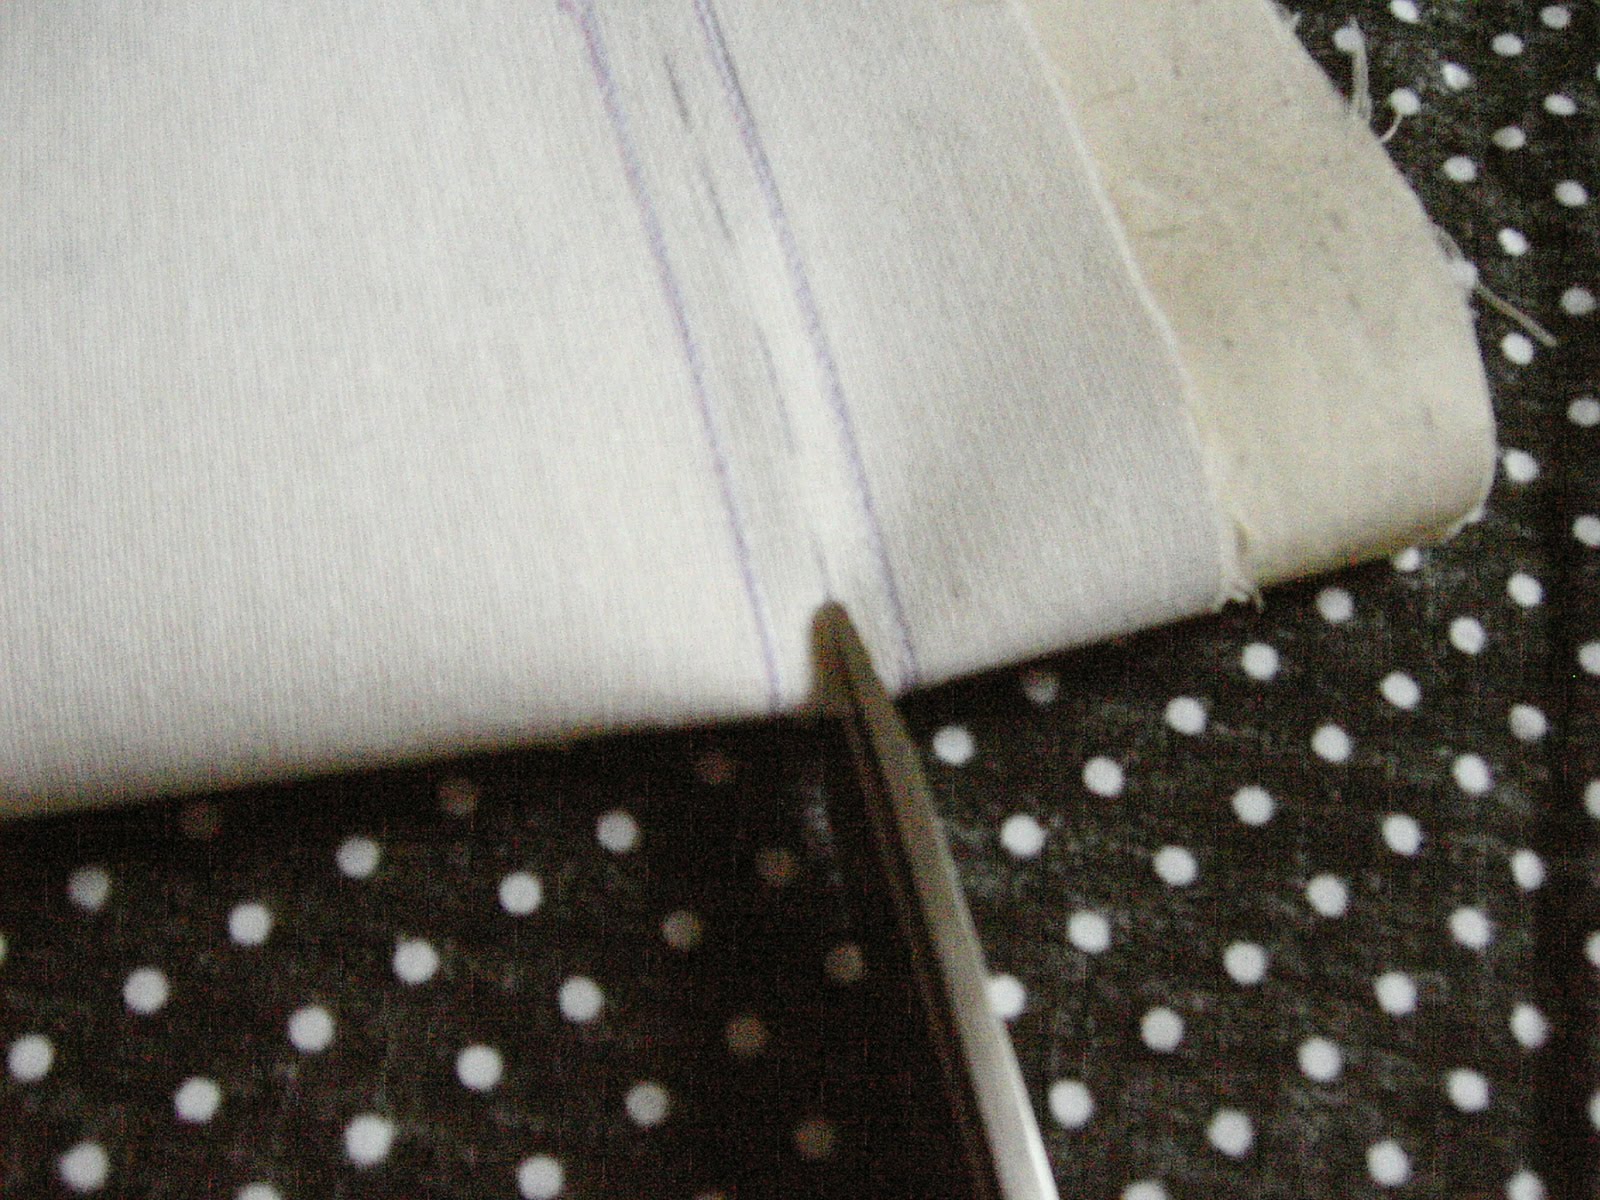
2. Draw a rectangle on the wrong side of your pocket fabric. The rectangle should be 1" away from the top and two sides.

Ignore the numbers in this picture. The rectangle is always 3/8" wide. Add 3/16" to your zipper for the length.
Draw a dotted line along the middle of the rectangle. At 3/8" from each end, mark a diagonal line to the corner to make a "Y" look. Refer to the next picture for this detail.
3. Find out the center of lining fabric and pocket fabric, lay them right sides together, the pocket fabric on top of the lining. Note that the top of pocket fabric is 1" lower from that of the lining fabric.

4. Sew around the rectangle.

5. Cut along the dotted line. You can lay your first snip by folding the fabric in half as shown below.


You'll end up with two dogs ears at both ends of the rectangle.

6. Turn the pocket fabric to the back of the lining through the hole.

 After you turn the whole pocket fabric to the back, press the fabric nice and neat with your iron. There shouldn't be any puckers as in the photo. When I was sewing the rectangle, I went a bit askew at the corners.
 7. Insert and baste the zipper to the rectangular opening.

8. Sew around the zipper using a zipper foot.
 Start from the tail of the zipper. At this point, the zipper is closed.
 As you sew towards the head, pull the zipper to the back so the head won't be in the way of your needle. Be very careful with this because zippers can easily break your needle.
Keep sewing and you're almost done!
9. Turn to the back. Fold the pocket fabric in half lengthwise to form the pocket. Pin and sew around the 3 sides. Make sure you don't catch the lining fabric as you sew. That is, you only sew 2 layers of fabric instead of all 3.

10. Voila! A zipper pocket finished. Laugh, clap and celebrate!


